Pre-Installation Considerations
A successful installation begins with thorough preparation. Acoustic LED screens demand careful planning beyond standard displays due to their dual audio-visual role.
Key Steps:
- Site Survey: Measure the installation area, confirm structural load capacity, and ensure adequate ventilation for heat dissipation.
- Sound Design: Determine speaker placement behind the screen for optimal audio projection.
- Electrical Planning: Map out power sources and cable pathways.
- Compliance Check: Verify adherence to FCC, CE, RoHS, and local regulations.
Proper groundwork sets the stage for a smooth install and long-term reliability.
Required Tools and Materials
Gather these essentials before starting:
- Acoustic LED modules
- Magnetic mounting brackets
- Control system (e.g., Novastar, Colorlight, Brompton)
- Power supply unit (e.g., Meanwell PSU—fanless or waterproof)
- Signal and power cables
- Safety ropes and screws
- Sound calibration tools (e.g., SPL meters, DSPs)
Having everything on hand minimizes delays and ensures efficiency.
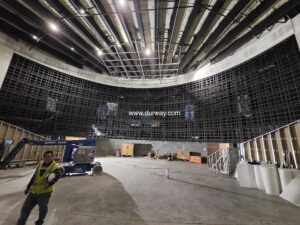
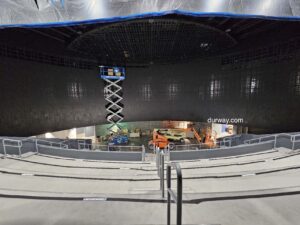
Step 1: Frame Construction and Mounting Brackets
Start by building a robust frame to support the screen’s weight and size. Aluminum alloy or steel works best for durability.
- Install magnetic brackets at pre-marked spots for module attachment.
- Use a laser level to confirm the frame is perfectly aligned.
- Secure safety ropes to brackets, protecting modules during and after setup.
A level, stable frame is critical for the screen’s structural integrity.
Step 2: Installing Acoustic LED Modules
Most acoustic LED screens use front-access magnetic systems for easy module placement.
- Begin at the center and expand outward to distribute weight evenly.
- Handle modules with care to protect sound-permeable micro-perforations.
- Wear anti-static gloves to avoid electrostatic damage.
- Snap modules into place, ensuring flush alignment with neighbors.
Precision here prevents gaps or audio disruptions later.
Step 3: Power Supply Unit Configuration
To keep noise and heat low, acoustic LED screens rely on remote or centralized power supply units (PSUs).
- Position the PSU (e.g., Meanwell) within 20 meters of the screen.
- Use UL/CE-compliant low-voltage cables.
- For outdoor installs, opt for IP65-rated waterproof PSUs.
- Connect to modules using labeled DC connectors.
A well-configured PSU ensures consistent power without interference.
Step 4: Data Control and Signal Cabling
Screen performance hinges on reliable data and signal delivery.
- Choose a control system like Novastar or Colorlight.
- Link the controller to your source (HDMI, SDI, or media server).
- Use shielded Ethernet or fiber cables, especially in noisy environments.
- Test signals on a monitor before full calibration.
Strong cabling prevents sync issues and visual glitches.
Step 5: Audio Integration Behind the Screen
The hallmark of acoustic LED screens is their ability to let sound pass through seamlessly.
- Place full-range or line-array speakers directly behind the modules.
- Use digital sound processors (DSPs) to tailor audio to the room’s acoustics.
- Ensure no panels block sound pathways for clear output.
- Run calibration tests to adjust EQ and delay settings.
Proper speaker placement and tuning deliver immersive audio experiences.
Step 6: Display and Sound Calibration
Fine-tune both visuals and audio for peak performance.
- Adjust brightness, contrast, and color temperature to suit lighting conditions.
- Check color consistency across all modules.
- Perform acoustic sweeps to confirm frequency response.
- Use SPL meters to measure sound levels across the audience area.
Calibration ensures a balanced, professional-grade result.
Step 7: Final Safety and System Checks
Before wrapping up, conduct a full inspection.
- Verify all brackets and modules are firmly in place.
- Confirm electrical grounding to prevent shocks or shorts.
- Test power cycles, signal stability, and module performance.
- Check system logs for errors or warnings.
- Label components for easy future reference.
This step guarantees safety and operational readiness.
Post-Installation Tips
To maintain performance:
- Plan maintenance checks every 6-12 months.
- Clean modules with air blowers or microfiber cloths to preserve perforations.
- Stock spare modules, PSUs, and cables for fast fixes.
- Train staff on basic troubleshooting and module swaps.
Proactive care extends the screen’s lifespan and reliability.
Conclusion
Installing acoustic LED screens is a blend of technical skill and strategic planning. From building a solid frame to integrating audio and calibrating output, each step ensures a seamless audiovisual experience. Whether enhancing a theater, museum, or corporate venue, this guide equips AV professionals with the know-how to deliver exceptional results.
For expert support and premium solutions, visit www.durway.com. Explore our products, access technical resources, or book a consultation with our team today. XeltovoPrime